header photo

Thursday, March 25, 2010

Done the Fretless Project! Well for now...

Over the past couple days I have been sealing and sanding. I think I ended up doing 5 coats of the minwax and sanded the final coat up to 800 grit. I have reassembled and cleaned my now fretless 5 string fender deluxe jazz bass! It might not be the prettiest but the sound is kick ass! I'll have to find my recording equipment so I can post a sound sample, maybe a video....

Doesn't look to bad!

The fingerboard looks good.

My two now custom bass guitars. The green one is a bass I made about 5 years ago (warmoth parts). They are completely different sounding.

Thursday, March 18, 2010

Sanding, Sealing

Today I finished sanding the neck and the sides were some of the super glue dripped. I also learned that a "thin" super glue works better then the regular superglue. The thin superglue takes advantage of capillary action to literally be sucked into tight areas and penetrate sawdust better.

I sanded the neck using my makeshift radiused sanding block. I started with 120 then 220 then 400. I really did not remove much of the original fingerboard.

After sanding with 400 grit sand paper and cleaning with a wet rag.

After letting the fingerboard dry for 4 hours, I applied the first layer of sealant. I decided to use MINWAX's Polycrylic clear satin. I decided on this finish because it is suppose to provide durable protection. Hopefully it stands up to strings. It is also water based, quick drying, and not stinky. It actually smells like Windex. Anyway, one coat down, probably 3 more to go.

MINWAX Polycrylic satin finish, first coat.

Close up after first coat.

The neck looks good. The finish seems to match the existing finish.

Tuesday, March 16, 2010

Sanding, Testing

So I sanded the fingerboard and filled in the fret grooves with saw dust from sanding and superglue and then sand some more!

Filling in the cracks with superglue and sawdust.

My home made radius-ed sanding block. I just put a piece of sand paper on the fingerboard and sanded a a piece of foam with it resulting in a foam radius-ed sanding block. I have no idea what radius it is though....

After some sanding with 220grit. It actually feels really smooth but I will take it up to 400 when finishing it.

Strung it up with some Ernie Ball custom gauge 5string flatwounds. As you probably have noticed I am missing a string. The low B string in this set is to thick for the bridge. I have to get a drill bit and make it a little bigger.

Close up.

All it needs now is some final sanding and a finish and its ready to go! I actually might finish this project! So far it plays nicely. I have to adjust the truss rod a little bit and lower the bridge a little. I get a really nice sound out of it! I am happy so far.

Monday, March 15, 2010

Bass Defretting

So I decided to convert my Fender 5 string deluxe jazz bass (Mexican) into a fretless bass. I decided to take the do-it-yourself approach. I went out to Lowe's and bought various sand papers, painters tape, superglue, wood filler, and an "end cutting pliers." The end cutting pliers is what I used to remove the frets with.

Here is the process I used to pull the frets out:

Step 1: Put painters tape as close to the fret as possible on both sides in order to protect the fingerboard as well as hold possible chips in place during fret removal.

Step 2: Use a soldering iron to heat the fret in order to loosen glues used to secure the frets.


Step 3: Slowly work the fret out by starting on one end of the fret and working to the other end.


Step 4: Carefully remove painters tape while looking for chips. If I found a chip, I held it inplace with my finger nail and removed the painters tape.


Step 5: Apply superglue to the fret slot to hold chips in place and prevent possible chipping when sanding. I also used wax paper to push down the wood on either side of the fret slot that had been pulled up.


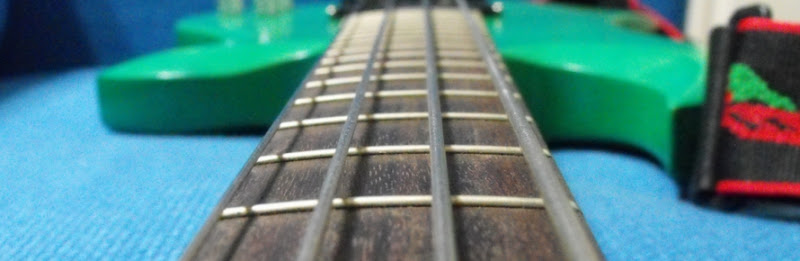
Now I just have to fill in the holes and make it look and feel pretty!